Sunday, June 28, 2009

I say tomahto…

Tomatoes v1

We have been enjoying the produce of our small vegetable patch this summer.  Every March, when we plant ours, I especially look forward to gorging on home-grown organic tomatoes and it doesn’t get much better than these purple heirlooms (next to my all time favorites – figs!). 

Tomatoes 013-crop v1

This is a traditional Srpska Salata - Serbian Salad.  Sliced tomatoes, green pepper, red onion, with a drizzle of extra virgin olive oil and a sprinkle of salt and freshly ground black pepper.   And Husbie says KISS - Keep It Simple Sam! 

Tomatoes 025-crop v1

Who can resist Insalata Caprese?  A perfect stack with thick slices of mozzarella and basil leaves nestled between sliced tomatoes and drizzled with balsamic vinegar and extra virgin olive oil:

Tomato mozzarella stack v1

 What do you do with a mango, a tomato and a jalapeno pepper?  Why, you make Salsa!

tomato mango salsa 008 v1

To balance the sweetness of the mango, I add red onion, lemon juice and lots of cilantro:  You can never have too much cilantro, if you ask me!

tomato mango salsa 004-crop v1

Tomato Mango Salsa on grilled salmon – refreshing summer fare:

Tomatoes 004-crop v1

Cherry tomatoes in potato salad:

Potato and tomato salad v1

On whole grain bread with melted feta cheese and oregano – bringing out the Balkan in me!

Tomatoes 014-crop v1

By now, I’m battling the birds and the stinkbugs.  The netting I have cast seems to be keeping the birds at bay, but the stinkbugs have struck overnight.  They are my biggest enemy during tomato season because they suck the Dickens out of the fruit and leave disease and rot behind.  We refuse to use pesticides and one year my daughter and I went out to do battle with our tweezers.  Yes, tweezers!  Stinkbugs aren’t fast, you see, so it was easy to pick them off and stomp them in the ground…as you can imagine, it was sooo time-consuming.  Needless to say, we lost the battle after a couple of days. 

I thought about spraying vinegar…nah, it’ll kill the plant.  My next means of attack is per Husbie’s suggestion – the vacuum cleaner!  Brilliant!  I can see myself with the suction hose, grinning from ear to ear, as those suckers enter the bag, never to pester my home-grown tomahtoes again!  I’ll let you know if it works! 

Basil detail 

Prijatno!

Sunday, June 21, 2009

The Daring Cooks make Chinese dumplings and potstickers

Dumplings 1

This is the first official challenge for the Daring Cooks and what a way to begin – one of my family’s favorites – Chinese dumplings, or potstickers (also known as Gyoza in Japan).   I have made them in the past using store bought wrappers -  until now!  The dough comes together in seconds and rests for about 15 minutes.  Once you have the chopping for the filling behind you (I won’t lie, it takes some time to chop the veggies), it’s easy to roll, fill and pleat the dough. 

Thanks to the remarkable Jen Yu at use real butter for organizing our challenge and also to the amazing duo, Lis and Ivonne, for founding this ever-growing group of fearless bakers and cooks.

The Daring Kitchen logo 

I have been a follower of Jen’s blog ever since I read this post at ‘use real butter’.  It was my first encounter with a food blog and it blew me away.   Jen is multi-talented, humorous, insightful, intelligent and always honest.  Her posts and photographs have awed and inspired me and some have even made me cry. 

Of Chinese decent, Jen’s recipes are not limited to specialties of the Far East, but encompass many drool-worthy non-Asian delicacies as well.  Her generosity in sharing her family recipes is well-noted and her instructional photos and detailed commentary make every step look easy.  In a couple of words: Jen rocks!

Now for the dumplings:  The whole point of Jen’s challenge is to make the dumpling wrappers from ‘scratch’ and to roll the dough with a rolling pin by hand.  This way, the wrappers will be uniform and the thickness consistent.  The ‘skin’ should be delicate and not dominate the dumpling.  I found the dough very easy to make – two ingredients in all - and a breeze to roll out. 

I was fortunate to have my dear friend, Chantal, visit from Provence on dumpling making day!  Cooking with Chantal is always a fun-filled affair and I look forward to every opportunity.  Chantal’s expert chopping techniques are evident here:

Dumplings2

Chinese Dumplings/Potstickers

Jen’s instructions are here.   

Pork filling:
1 lb (450g) ground pork
4 large Napa cabbage leaves, minced
3 stalks green onions, minced
7 shitake mushrooms, minced (if dried - rehydrated and rinsed carefully)
1/2 cup (75g) bamboo shoots, minced
1/4 (55g) cup ginger root, minced
3 tbsp (40g) soy sauce
2 tbsp (28g) sesame oil
2 tbsp (16g) corn starch

OR

Shrimp filling:
1/2 lb (225g) raw shrimp, peeled, deveined, and coarsely chopped
1/2 lb (225g) ground pork
3 stalks green onions, minced
1/4 cup (55g) ginger root, minced
1 cup (142g) water chestnuts, minced
1 tsp (5g) salt
3 tbsp (40g) sesame oil
2 tbsp (16g) corn starch

Combine all filling ingredients in a large mixing bowl and mix thoroughly by hand. Cover and refrigerate until ready to use (up to a day, but preferably within an hour or two).

We added finely chopped Chinese chives to the pork dumplings.  I happened to have some growing in a pot outside – fancy that Jen?  They are a little different from regular chives in that they have a flat surface similar to grass and have a garlicky aroma.  We added several blades for good measure!Chives

Dough: (double this for the amount of filling, but easier to make it in 2 batches - or just halve the filling recipe)
2 cups (250g) all-purpose flour
1/2 cup (113g) warm water
flour for work surface

Make the dough: Place the flour in the work bowl of a food processor with the dough blade. Run the processor and pour the warm water in until incorporated. Pour the contents onto a work surface and knead until uniform and smooth. The dough should be firm and silky to the touch and not sticky.[Note: it’s better to have a moist dough and have to incorporate more flour than to have a dry and pilling dough and have to incorporate more water).  It will NOT be a soft bread dough.

Knead the dough about twenty strokes then cover with a damp towel for 15 minutes. Take the dough and form a flattened dome. Cut into strips about 1 1/2 to 2 inches wide. Shape the strips into rounded long cylinders. On a lightly floured surface, cut the strips into 1/2 inch pieces. Press palm down on each piece to form a flat circle (you can shape the corners in with your fingers). With a rolling pin, roll out a circular wrapper from each flat disc. Take care not to roll out too thin or the dumplings will break during cooking - about 1/16th inch. Leave the centers slightly thicker than the edges. Place a tablespoon of filling in the center of each wrapper and fold the dough in half, pleating the edges along one side (see images in post for how to fold pleats). Keep all unused dough under damp cloth.

My daughter loved the dumplings so much that I had to make another batch the following day.  Instead of the shitake mushrooms, I added a finely chopped red pepper, and water chestnuts instead of the bamboo shoots.  Dynamite!

Dumplings3

Dumplings at attention:  it doesn’t take long when there are four hands  – Chantal rolled and I filled and pleated the dough. 

Dumplings4

To boil: Bring a large pot of water to a boil and add dumplings to pot. Boil the dumplings until they float.

To steam: Place dumplings on a single layer of Napa cabbage leaves or on a well-greased surface in a steamer basket with lid. Steam covered for about 6 minutes.

To pan fry (potstickers): Place dumplings in a frying pan with 2-3 tbsp of vegetable oil. Heat on high and fry for a few minutes until bottoms are golden. Carefully add 1/2 cup hot water and quickly cover tightly with lid. Cook until the water has boiled away and then uncover and reduce heat to medium or medium low. Let the dumplings cook for another 2 minutes then remove from heat and serve with dipping sauce.

To freeze: Assemble dumplings on a baking sheet so they are not touching. It helps to rub the base of the dumpling in a little flour before setting on the baking sheet for ease of release. Freeze for 20-30 minutes until dumplings are no longer soft. Place in Ziploc bag and freeze for up to a couple of months. Prepare per the above instructions, but allow extra time to ensure the filling is thoroughly cooked.

Dipping sauce:
2 parts soy sauce
1 part vinegar (red wine or black)
a few drops of sesame oil
chili garlic paste – we added Sriracha hot chili sauce
minced ginger to taste
minced garlic to taste
minced green onion to taste
sugar – just a pinch

For potstickers, the bottoms must be golden!  Yuuummmm!

Dumplings5

Prijatno!

Sunday, May 31, 2009

Daring Baker’s challenge: Apple Cherry Strudel

DB Strudel (10) v1

This month’s Daring Baker’s challenge brought back many memories of my dear maternal grandmother. It was fascinating for a little girl like me to watch my ‘Baba’ as she miraculously transformed a small ball of dough into a thin sheet of pastry that draped the entire kitchen table, including a generous vertical on all sides that headed towards the floor!

At the time, of course, I could only imagine that I would be making my own strudel dough one day. As an adult, I always believed it to be too delicate a process that required a lot of experience and skill…NOT! It is so easy to make and much tastier than the purchased frozen fillo sheets. I think I’m even going to convince my sister, Vesna, who regularly makes apple strudel, to give it a try.

My ‘Baba’s’ strudel filling was made of apples that were grated and not chopped. When apples are grated and combined with sugar and cinnamon, they release a lot of their juices. This sweet, cinnamon-y apple juice is the best byproduct of all, and it’s that which my siblings and I fought over! Today, I savored the sweet juice once again, and privately toasted my Baba and thanked Linda and Courtney for choosing apple strudel for this month’s DB challenge.

DBKitchen logo

The May Daring Bakers’ challenge was hosted by Linda of make life sweeter! and Courtney of Coco Cooks. They chose Apple Strudel from the recipe book Kaffeehaus: Exquisite Desserts from the Classic Cafés of Vienna, Budapest and Prague by Rick Rodgers.

Apple strudel
from “Kaffeehaus – Exquisite Desserts from the Classic Cafés of Vienna, Budapest and Prague” by Rick Rodgers

1 1/3 cups (200 g) unbleached flour
1/8 teaspoon salt
7 tablespoons (105 ml) water, plus more if needed
2 tablespoons (30 ml) vegetable oil, plus additional for coating the dough
1/2 teaspoon cider vinegar

1. Combine the flour and the rest of the ingredients in a medium size bowl. Mix together with a spoon until combined. If it is dry, add a little more water.

2. Transfer to a work surface and knead by hand, using a sparse amount of flour, if necessary. Knead for about 5 minutes, and pick up the dough and throw it down hard onto your working surface occasionally. Shape the dough into a ball and lightly oil it on all sides with olive oil. Transfer it to a plate. Cover the ball with plastic wrap. Allow to stand for 30-90 minutes, the longer the better.

3. It would be best if you have a work area that you can walk around on all sides like a 36 inch (90 cm) round table or a work surface of 23 x 38 inches (60 x 100 cm). Cover your working area with a table cloth, dust it with flour and rub the flour into the fabric. Put your dough in the middle and pat it out as much as you can. Pick the dough up by holding it by an edge. The weight of the dough and gravity will help stretch it as it hangs. Use the back of your hands to gently stretch and pull the dough. You can use your forearms to support it as well.

4. When the dough becomes too large to hold, put it on the table cloth. Continue to gently stretch the dough as you walk around the table. If it tears, keep on going – it won’t be noticeable when it’s rolled up. Place your hands underneath the dough and stretch and pull the dough using the backs of your hands. You will have a thick edge that may hang over the edge of the table.

When the dough measures about 2 feet (60 cm) wide and 3 feet (90 cm) long, cut away the thick dough around the edges with scissors. The dough can sit for a few minutes while you make the filling, but do not let it dry out. Preheat oven to 400°F (200°C). Line a large baking sheet with parchment paper. Grease parchment lightly with a little melted butter.

Apple and Cherry filling (my version)

  • 1/2 cup plain crumbs, lightly toasted
  • 1/2 cup walnuts, toasted and ground
  • 1 tablespoon brown sugar
  • 4 tablespoons unsalted butter, melted

Combine crumbs, walnuts and brown sugar in a small bowl. Using a spoon, sprinkle about 3 tablespoons of melted butter on dough and spread it gently with your fingers. Sprinkle the crumb/nut mixture on dough, as shown below.

DB Strudel4

  • 4 Granny Smith apples, or any other tart apple
  • 4 tablespoons brown sugar
  • 1 teaspoon cinnamon
  • 1/2 cup cherries, pitted and halved

Peel the apples and grate them using the coarse side of a grater. Place them in a bowl and add the sugar and cinnamon. Let apples sit for about 10 minutes so that the juices are released. Using your hands, squeeze grated apples gently, leaving most of the apple juice in the bowl. Transfer apple to another bowl. Add cherries and combine.

The delicious apple juice is in the glass

DB Strudel (4)-crop v1

Spread the apple filling along one long edge of the dough. Grasp the tablecloth with both hands and lift it up so that the dough and filling roll up to the other end. At this point you can curve the roll into a U-shape and place it on the baking sheet, or cut it into two long rolls and place them side by side on the baking sheet. Brush the top and sides of the roll with the remaining melted butter. Bake at 400°F (200°C) for about 20-30 minutes or until nicely browned.

DB Strudel (7)-crop v1

Cool on rack for about 30 minutes. To finish, sprinkle some confectioner’s sugar on top of strudel through a sieve.

Very flaky!

DB Strudel (17)-crop v1

Prijatno!

Thursday, May 21, 2009

TWD Fresh mango (bread) muffins

TWD Mango cupcakes2

I was intrigued when I first found out that Fresh Mango Bread was the TWD (Tuesdays with Dorie) recipe for this week. I’ve made many banana, apple, cranberry, blueberry, carrot and even a zucchini bread, but mangos in a loaf never crossed my mind.

When I read the recipe, I suspected that the subtle flavor of one diced mango would not be very prominent in the bread, so I looked for ways to make it more mango-ey. And as my family already knows, in true Dragana fashion, I just had to put my twist to it: the raisins had to go – they’re way too pedestrian! What I found were delicious, sweet and intensely flavored dried mango pieces. To 1/2 cup of chopped dried mango, I added just enough rum to cover them. Later, I added 3 tablespoons of the soaking rum to the batter (I’m never in favor of discarding good liquor!). I reduced both the sugar to 3/4 cup and the ginger to 1 teaspoon – after all, it’s all about the mangoes, right? I came away with 12 moist and tasty individual muffins.

tuesdayswithdorielogo

Thanks to Kelly at Baking with the Boys for selecting this recipe. You can find the original recipe on her blog. After the TWD chocolate onslaught in April, this was a refreshing change. Topped with lightly sweetened whipped cream, diced crystallized ginger, freshly grated lime zest and a chunk of dried mango, these muffins are a winner! Just ask Carolina!

TWD Mango cupcakes1

Prijatno!

Tuesday, May 12, 2009

Fresh pear cake

fresh pear cake1

Sometimes my eyes are just too hungry!   And when my eyes are hungry, I buy too much.  I am a lover of all fruit, tutti fruiti!   You name it – there’s not a fig, berry, stone fruit, pome, citrus, tropical, melon, seed-in or seedless piece of fruit that I’ve tried whose flesh and nectar doesn’t excite me!  Be it fresh, stewed, in a tart or pie, creamed, sorbeted, preserved, jammed, compoted, frozen or flambéed – if it’s fruit, count me in! 

So it was with the pears recently.  I found myself with a cornucopia in the fruit bowl, ripe and ready to be eaten.  Juicy and aromatic, but too many for the two of us, they were a perfect excuse for me to kick into baking gear!   

Pears and ginger are in combination with cinnamon and pecans in this cake.  I prefer my ginger fresh and always have a piece in the refrigerator.  I grate it using a handy zester called a microplane.  Peel the ginger and press firmly as you grate to cut the fibers.  This moist cake is easy to make and remains fresh for several days.

Fresh Pear Cake

Adapted from Allrecipes

  • 4 cups peeled, cored and diced pears (about 3-4)
  • 1 cup granulated sugar, divided use
  • 2 –3 teaspoons freshly grated ginger root (or 1 teaspoon ground ginger)
  • 2 ¾  cups all-purpose flour
  • 1 teaspoon salt
  • 1 ½ teaspoons baking soda
  • 1 teaspoon cinnamon
  • 3 eggs
  • 2/3 cup canola oil
  • 1 cup pecans, toasted and chopped

Combine the pears, 1/2 cup sugar and ginger in a large bowl and let stand for an hour.  Combine flour, salt, baking soda and cinnamon in another bowl and set aside.

Preheat oven to 325°F.  Spray a 10 inch Bundt pan with non-stick baking spray.

Beat eggs and remaining 1/2 cup sugar in stand mixer (or with a hand mixer) until pale and creamy.  Add oil and blend in slowly.  On low speed, blend in the flour mixture until most of the flour is mixed in.  Scrape down the sides of the bowl with a spatula.  Add the pears and pecans and stir on slow speed until just incorporated into the batter.  Do not overbeat.

Pour batter into Bundt pan.  Bake at 325°F, checking after 50 minutes.  When a skewer comes out clean, remove cake from oven and cool on rack for 10 minutes.  Invert cake on a large plate and slide it back onto the rack to cool completely.  Sprinkle the top with confectioner’s (icing) sugar, using a sieve to distribute it evenly.

fresh pear cake2

Enjoy a slice with a cup of tea, coffee or a glass of cold milk!

Prijatno!

Tuesday, May 5, 2009

Cinco de Mayo!

linda landeros

Hola, dear friends!  Today many Americans of Hispanic heritage commemorate the victory of a small, ill-equipped Mexican army over a much larger and more sophisticated French militia at the Battle of Puebla.  The Batalla de Puebla took place on May 5, 1862.  Contrary to popular belief, Cinco de Mayo is not Mexico’s Independence Day (that being September 16, 1821).  It is not widely celebrated in Mexico but is a regional holiday limited to the state of Puebla.

The Darling Bakers are also celebrating Cinco de Mayo today!  Here’s how the holiday came to be:  darling baker Napoleon III was determined to collect a loan and expand his empire.  His troops landed near the coast of Veracruz and proceeded to march towards Mexico City.  Abraham Lincoln, sympathetic to the Mexican cause, could offer no assistance because he was involved in his own war, the American Civil War.  In Puebla, General Ignacio Zaragoza Seguin and his small militia were able to stop and defeat the French.  It was a sweet victory for a troubled country.

But that was not the end of the French!  Napoleon sent 30,000 (yes, thirty thousand!) more troops who eventually took over Mexico City.  His cousin, Archduke Maximillian of Austria became the ruler.  After the American Civil War, Lincoln provided more military assistance and Maximillian was executed in 1867.  That, in a nutshell is the story behind CDM.

That’s Linda Landeros in the picture above.  Landeros is a dance instructor and performer with many dance companies in the San Francisco Bay Area.  The colors in her dress express the spirit and vitality of the Mexican people.  In the US, particularly in the border states, Cinco de Mayo is celebrated with music, folklore dancing, art and of course food!

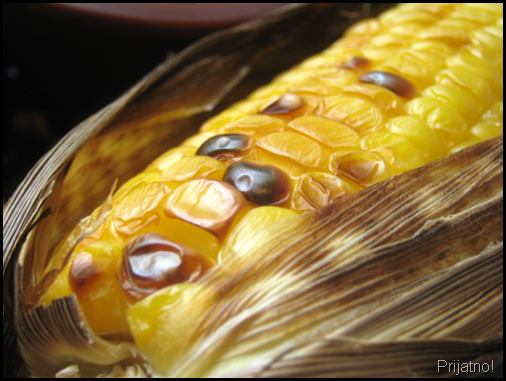
One of my favorite Mexican foods is grilled corn with a chili lime sauce.  I first came across it outside a local Hispanic grocery store called Fiesta.  The aroma of roasted corn wafted through the parking lot, leading me to a mobile kitchen where the vendor was slicing the kernels off the cob and into a styrofoam cup.  He topped it off with a delicious, spicy and creamy sauce.  My daughter and I just can’t resist this kind of street food!

Mexican grilled corn1 I broiled these in their husks.

Mexican grilled corn2

Quesedillas are also a favorite.  These are filled with crabmeat, roasted poblano pepper, roasted sweet red pepper, avocado, caramelized red onion, corn, cilantro, chili powder and Monterrey jack cheese.  I served them with my Cilantro Crema – sour cream, lime juice and chopped fresh cilantro. 

Crab quesedillas

This is how I like my cerveza:  ice cold and in an ‘O’ with lime.  Believe it or not, that’s the entire 12oz. bottle in there!

Cervesa1

Lime suspended in a golden brew:

Cervesa2

Mangos flameados comes from Diana Kennedy’s classic book The Cuisines of Mexico.  It’s a Mexican take on Bananas Foster crossed with crepes Suzette!  I served it with vanilla ice cream.   Mmmm….

Mango flammeado

These Mexican Nutella cookies are perfect with a cup of coffee.  You can serve them plain or with a dusting of powdered sugar.

Mexican nutella1

I leave you with a bite!   Adios!

Mexican nutella2 

Prijatno!

Monday, April 27, 2009

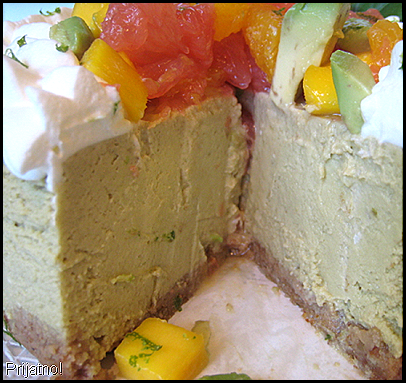
Sweet avocado cheesecake with mango and citrus ‘salsa’

avocado cheesecake3

Sounds weird, I know!

1. I had half a dozen ripe avocados staring at me from the fruit basket and

2. I had a Daring Bakers Challenge to do. The challenge was to make a cheesecake and a basic recipe was posted with instructions to make it ‘unique’ and get creative with flavors and presentation.

Put these two entities together and what do you get? Sweet Avocado Cheesecake!

I remembered an avocado cheesecake a couple of years ago at the innovative Cafe Red Onion, a Latin fusion restaurant. It was delicious. Avocados, being neutral in flavor, lend themselves to savory or sweet renditions. I believed that the velvetiness would enhance the creamy texture of my cheesecake. I would add lots of lime juice in an attempt to keep the color fresh. I was so excited about the idea I began baking right away.

The verdict: I liked it! My neighbor, Carolina loved it! She couldn’t detect the taste of avocado at all. Her daughter thought it was a pretty good lime cheesecake. Husbie wouldn’t go near it! And my sister and her family expressed a distinct dislike for the texture and color. Thanks, Ve and co. for your honesty! My friend Alma did not care for it. Her charming son, Joey, thought it was ‘interesting’ but liked it! And her husband John… haven’t heard back from him yet!

So, I’d say it’s a clear winner!!! I guess it’s not for everyone!

The Daring KitchenThe April 2009 challenge is hosted by Jenny from Jenny Bakes. She has chosen Abbey’s Infamous Cheesecake as the challenge. You can click on her site to find the original recipe. Thanks to Jenny and the founders of the Daring Bakers, Lis and Ivonne for keeping the ‘daring’ in over a thousand bakers all over the world!

I modified Abbey’s Infamous Cheesecake a little so that I could incorporate the avocados and lime juice. Next time I make it (yes, there will be a next time), I will use one avocado less so that the cheesecake is a more pleasing color. Some people just couldn’t handle it! The mango and citrus ‘salsa’ is sweet and tart and is a nice contrast to the creaminess of the cheesecake.

Sweet avocado cheesecake with mango and citrus ‘salsa’ Make the cheesecake the day you plan to serve it because it needs to chill overnight. The ‘salsa’ should be made the day of serving (see instructions below).

  • Almond Crust
  • 1/4 cup almonds
  • 1/2 cups graham cracker crumbs
  • 2 tablespoons sugar
  • 5 tablespoons butter, melted

Put almonds in processor and pulse until finely chopped. Add graham cracker crumbs, sugar and melted butter and pulse until blended but still crumbly. Pat into the bottom and a little up the sides of a 9” springform baking pan (I made two small cakes – one 5” round, and one 6 1/4” round). Set aside.

avocado cheesecake4

  • Cheesecake batter
  • 2 packages cream cheese, softened to room temperature
  • 1 cup sugar
  • 3 eggs
  • 1 teaspoon vanilla essence
  • 2-3 (I’d go with 2) ripe avocados, peeled and pitted
  • zest of 1 lime
  • 1/4 cup fresh squeezed lime juice
  • 1 cup sour cream
  • 1 tablespoon rum
  • pinch of salt

Prepare a water bath by half filling a shallow roasting pan with very hot water. Place the pan on the lowest rack in the oven. Place another rack in the middle of the oven. Preheat oven to 300 degrees F.

In a mixer, combine cream cheese and sugar. Beat on medium speed until smooth. Add vanilla and eggs, one at a time until all are incorporated.

Place avocados in a food processor. Blend until very smooth. Add zest, lime juice, sour cream, rum and salt. Blend well.

Add avocado mixture to cream cheese mixture and blend on low speed until well blended. Pour into cake pan. Place pan on middle rack in oven. If you’re using a 9” pan, bake for 45 minutes than check to see if it set but still a little ‘jiggly’ in the middle after you bump the pan a little.

Remove from oven and cool completely on a rack. Chill overnight.

  • Avocado ‘Salsa’
  • You can make the salsa without the avocado ahead of time. Peel and cut avocado not too long before you plan to serve it so that it doesn’t discolor.
  • 1/2 ripe avocado, peeled and cut into 1/2 inch pieces
  • juice of 1/2 lime
  • 1 orange, peeled and segmented then cut into 1/2 inch pieces.
  • 1/2 grapefruit, peeled and segmented then cut into 1/2 inch pieces
  • 1 mango, peeled, flesh cut into 1/2 inch pieces
  • 1/2 teaspoon lime zest

Combine avocado and lime juice in medium bowl. Add the rest of the ingredients and let it sit for about 5 minutes. Place fruit mixture in a sieve and drain juices off before decorating cheesecake.

avocado cheesecake1

Prijatno!

Avocado on Foodista