Showing posts with label Christmas. Show all posts

Tuesday, December 29, 2009

Grand Marnier date balls

Date Balls 038 v2

2010 is almost upon us so let the New Year’s Party preparations begin!  If you’re just about ‘baked up’ as I am, you’ll be thankful for this easy recipe that takes less than 5 minutes to make and a few more minutes to form into balls for a pretty presentation. 

These Date balls shown in enormous detail above! are a standard dessert item at our annual Eastern Orthodox St. Nicholas celebration every December 19th and continue to please at every occasion beyond.   The infusion of Grand Marnier and orange zest in the dates creates an elegant and decidedly adult treat.  Chocolate plays second fiddle and acts merely as a binder.

I prefer Medjool dates for their dark, succulent flesh and intense honey-like sweetness.  Also known as the Queen among dates, the Medjool palm originated in Morocco and was brought to California in the early 20th Century where it has been cultivated ever since.  Dates were an important fuel for the desert tribes and nomads of north Africa and the Middle East.  Because they travel well, they were successfully introduced to the Greeks and Romans on the other side of the Mediterranean, where they were highly prized and sold at markets wrapped in gilded paper.  

Dates are high in potassium, fiber and  natural sugars which make them a perfect energy snack for athletes.  Check out my date energy bars that I make for my ride during the MS150 every year.  They are also marvelous in savory dishes.

I suggest you make the mixture a couple of days before you plan to serve the balls.  It will allow the rich flavors to ‘marry’ and we all know that good things come to those who wait ….


Place pitted dates, walnuts and Grand Marnier in a food processor

Date Balls 003 v2

Process until it’s a coarse mixture 

Date Balls 007-crop v2

Add orange zest and melted chocolate and pulse until it all comes together

Date Balls 009-crop v1

It’s that simple!


Date Balls – if possible, make the mixture a couple of days before you plan to serve.  Makes about 40 balls.

8 oz. (2 cups) pitted whole dates, preferably Medjool

1 cup walnuts

1 tablespoon Grand Marnier, brandy or orange juice concentrate

fine zest of 1 orange

½ cup chopped bittersweet chocolate or good quality semi-sweet chocolate chips (Callebaut, Ghirardelli 60% cacao or Guittard would work well.  The cheaper brands have too much sugar and are less flavorful).

sparkling (sanding) sugar or confectioner’s sugar

Put dates, walnuts and Grand Marnier in a food processor. Pulse until coarsely chopped (see photo above).

Melt chocolate slowly in a double boiler or microwave. Add zest and melted chocolate to the date mixture and pulse just until the mixture comes together.  If necessary, add a little more melted chocolate.  Transfer to a bowl, cover and chill for a couple of days so that the flavors can blend.

When you are ready to make the date balls, scoop a little of the mixture (I use a melon ‘baller’) and shape into small balls using your fingers .  Roll in sparkling sugar or confectioner’s sugar.

Serve in decorative paper cups, if desired.

 Date Balls 020-crop v2 

Prijatno!  

Tuesday, December 8, 2009

Scottish oatmeal with Cranberry-orange compote for a *snowy* day

046-crop v1

A thrilling and arousing event took place on Friday, my friends: it snowed in Houston!   A rare sight in our subtropical part of the world, it caused squeals of excitement that could be heard all the way from the end of the street!  The earliest snowfall in any year on record, some areas near Galveston received as much as one to three inches.  Quite an experience for some kids who have only seen the white powder in pictures.

The following (cold and icy) morning our droopy roses looking like they were made of crystallized sugar.

009-crop v1

And the clouds gave way to beautiful crystal clear skies.

027

With all the Holiday parties, cookie exchanges and baking, it’s a good idea to make sure that one’s system is moving, if you know what I mean!  Oatmeal is a heartwarming way to start the day, especially when you’ve braved a snow storm and sub zero temperatures, such as we have! 

I like to use Scottish oats because they are ‘steel-cut’ and minimally processed . The oat groats are ground into a coarse meal, resulting in a chewy, yet creamy oatmeal.  Irish oats (also steel-cut) are coarser, and must be cooked longer.  Steel cut oats differ from rolled (old-fashioned) oats because rolled oats are groats that have been flattened and softened into flakes which are then steamed, thus allowing them to cook quicker.  High in iron, protein and fiber, it is best to cook steel-cut oats al dente to maintain their nutritional benefits.  Instant oats are precooked, prefabricated and dried and provide far fewer nutritional benefits.  The faster the oats cook, the quicker they will cause a spike in insulin - so don’t bother with Instant oats at all, plus the packets are loaded with way too much sugar. 

Fresh cranberries are a staple in my refrigerator at this time of year, but they can and should be eaten year round - they freeze well and maintain their juices and flavor.  I must be one of the few crazy people who can tolerate their tartness and eat them raw…pucker!   I’m always looking for new and inventive ways to incorporate them into our meals and desserts, other than with the standard turkey or ham stay tuned for more recipes.  They are loaded with Vitamin C and are high in fiber and when made into a tangy compote, they will perk up your everyday oatmeal!      

Scottish oatmeal for two

½ cup Scottish oatmeal (I like Bob’s Red Mill, available in many grocery stores)

pinch of salt

1½ cups cold water

pinch of ground cinnamon

milk, optional

Whisk oatmeal, salt and water in a small pot and bring to a boil on medium heat. Reduce heat to low and allow oatmeal to cook for about 8 - 10 minutes, whisking occasionally. Remove from heat and serve with cinnamon, Cranberry-orange compote and a little milk, if you so wish.

039-crop v1

Cranberry-orange compote for two

½ cup fresh cranberries

1- 2 tablespoons white or brown sugar

zest from about  half an orange

¼ cup water

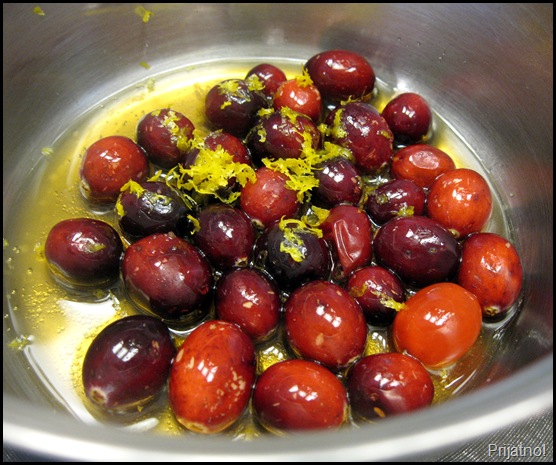
Place all ingredients in a small pot and stir to combine. Bring to a boil over medium heat. Reduce heat to low and cook for about 8 minutes or until the cranberries are soft and the compote has thickened.

Serve hot with Scottish oatmeal.

I couldn’t resist grating some extra orange zest on top of it all!

053-crop v1

Prijatno!

Wednesday, January 7, 2009

Mir Božiji, Hristos se rodi!


Mir Božiji, Hristos se rodi! That is the greeting that all Serbian Orthodox Christians exclaim today. It means: God’s peace, Christ is born! The response is Vaistinu se rodi! or Indeed He is born!

If it’s January 7, it’s Božić – Christmas for the Serbian Orthodox people! Because our church calendar follows the Julian calendar, we are thirteen days behind all other Christians in celebrating the birth of Jesus. Only the Russian Orthodox and the monks of Mount Athos in Greece follow the same.

Several years ago, I woke up to a radio program they called “The Little Christmas”. The warm sound of a Russian men’s church choir singing a cappella filled the air and I was overjoyed that our Christmas was receiving some recognition here in North America. It is a Christmas far less commercialized, with many interesting customs.

As a child, I remember watching in awe on Christmas Eve (Badnje Veče), as the priest lit the badnjak (yule log). This is a ritual that symbolizes light and sacrifice, so that the fields are fertile in the coming year and the family has health and happiness. Every family received a small branch of the badnjak, which was decorated with dried fruit, wheat, candy, hazelnuts, walnuts and coins. The church floor was covered in hay, a reminder of Christ’s birthplace.
Badnjak

On Christmas Day, we woke up early to see what small gifts Božić Bata (Serbian Santa), left for us in our shoes by the door. Usually it was a small gift, an apple or an orange, nuts and a piece of candy. Very modest, indeed. But the highlight of the day was the Christmas feast. It usually included a whole pig, roasted over a period of several hours on a spit, sarma (stuffed cabbage leaves) and a special round loaf of bread called česnica. Before baking the česnica the hostess slips a coin in the dough. When it is time to feast, the family gathers in a circle and each member pulls a piece of the česnica, hoping to find the coin in their portion. The promise of health and good luck for the rest of the year is at stake!


Several years ago, I came across a good recipe for česnica published by ‘Karen in California’ on
Virtual Tourist. Here it is, including my revisions for using instant yeast:

Česnica
The beauty about this recipe is that you don’t need to ‘proof’ the yeast, or test it for its freshness. Simply combine it with the flour and it’s good to go!

5 cups all-purpose flour, plus more for kneading
1 tablespoon (1 packet) instant yeast
1 cup water
1 cup milk
3 tablespoons sugar
1 teaspoon salt
1 stick (4 oz) unsalted butter, cut into about 8 pieces
3 eggs, divided use
olive oil
You will also need a candy thermometer to measure the temperature of the liquids.

Put flour and yeast in bowl of mixer and blend with a paddle attachment. In a large glass measuring bowl, combine water, milk, sugar, salt and butter pieces. Microwave until butter is melted and sugar is dissolved. Let cool until the temperature measures 120°F – 130°F.
Lightly beat two eggs with a fork in a medium bowl to break them up. Add a small amount of milk mixture to temper the eggs. Add eggs to the rest of the milk mixture.
Turn mixer speed to low. Slowly pour milk mixture to flour. When incorporated, beat at medium speed for about 2 minutes. The mixture will be sticky.
Pour about 2 tablespoon of olive oil in the bottom of a large bowl and spread it on the bottom.
‘Flour’ a counter space with about 1 cup of flour. Pour dough onto flour and knead for about 5 minutes, incorporating most of the flour. Place dough in a well-oiled bowl, and then flip the dough over so that all sides are oily. Cover the bowl with a towel and let it rest in a warm place until doubled in size, about 30 minutes.
Lightly grease a large round baking pan (I use a 12-inch round one) with olive oil and set aside.
Add a little more flour to the counter space and place the beautiful, soft, risen dough on it. Cut a small piece off for the cross decoration and put it aside. Lightly flour the top of the dough and fold the dough over itself 3 or 4 times. Hide the coin in the dough and forget about where you placed it! Place it in the baking pan. Roll the remaining dough into 2 strips and place them on the dough in the shape of a large cross. Cover and let it rise in a warm place for an additional 30 minutes, or until it fills up the pan.
Beat the remaining egg with 1 teaspoon of water in a small bowl and brush the top of the dough gently with it.
Bake in a preheated 350°F oven for until well browned and baked through, about 40 minutes.
Enjoy the česnica with your family and friends and may the person who gets the coin have good luck and great health for the rest of the year!


One final note on this special day goes to my special brother, Božidar, who interrupted my mother’s preparations for the feast and came in a hurry on Božić. Bož was initially named ‘Milan’, after two uncles, and went by that name during his formative years. That is, until a sweet old Serbian lady exclaimed in complete shock that my brother, being a special gift from God brought his own name by being born on Christmas day, and what were my parents thinking?! Sretan Rođendan, Bož, and I’m glad they finally got your name right!

Prijatno!

Saturday, January 3, 2009

Not your traditional French Mother's Yule Log!


It goes without saying that the ultimate Christmas cake is the Buche de Noel, or French Yule Log. Traditionally it is a chocolate rolled cake (jellyroll style), filled with a rich buttercream and decorated with rich chocolate icing. This icing is ridged to resemble the bark of a tree. Leaves, berries and mushrooms (made of meringue) decorate the log. All in all, it is a beautiful and delicious presentation for the end of a holiday meal.
This month's Daring Baker's Challenge is a modern take on the Yule Log. It is a layered construction consisting of six (6) different 'elements'. They are, from top to bottom: Icing, Creme Brulee layer, Mousse, Praline Feuillete (Crisp), Ganache layer and Dacquiose. Our challenge was to include all six elements and have fun,fun,fun with the flavorings, shape and decoration.
Yes, it was fun because I enjoy a challenge every now and again, but this challenge called for major organization. When I first printed all 15 pages or so, I was overwhelmed. Of course, it being the holiday season added to my apprehension. I triple punched the sheets and awarded them their own three-ring binder. I put them away for 3 weeks, with only a casual glance now and then. When I was finally able to sit down and make some decisions about flavors, I felt like a college student studying for finals! Fortunately, a container of crystallized ginger, gingersnaps and a bag of almonds jumped out at me from the pantry and the decision was made: Ginger, Chocolate and Almond Yule Log. Having eliminated many of the flavor options included in the recipe, I felt my task would be a lot simpler to execute!
I baked over a four day span. On the first day I made the Almond Dacquoise and the Ginger Creme Brulee layer. On day two I made the Praline for the Feuillete, the actual Praline Feuillete Crisp, and the Dark Chocolate Ganache. On the third day, I made the Dark Chocolate Mousse and assembled the log with little trouble and froze it. On New Year's Eve, I poured the Dark Chocolate Icing on the log and decorated it with fresh cranberries and holly leaves.
The dessert was very well received by my wine group buddies. The ginger flavoring took front seat and blended very well with the dark chocolate. The texture was smooth and creamy, with a surprise crunch from the Feuillete Crisp. The host couple called on New Year's Day, asking where I had stashed the leftovers! Well, there were none, since it generously served 13 people.

This month's challenge is hosted by Hilda of Saffron & Blueberry (http://saffronandblueberry.blogspot.com/) and Marion of (Il en faut peu pour etre heureux (http://ilenfautpeupour.canalblog.com/). Thanks ladies for organizing this major challenge!

The author of the recipe is Flore of Florilège Gourmand . The recipe can be found on her website: http://plaisirgourmand.perso.cegetel.net/index.html. Bakers: check out her website! It is amazing and full of photographs, technique tips and recipes! It is one of my 'favorites' and will be a valuable source for me.
About the recipe:
The recipe (I should say recipes), as printed, is not for the faint at heart. Bless the French, but they don't write recipes the way we do here in the States. Ingredients are not listed in order of use and some important steps in the method are completely left out. For those of us who have experience baking, it was merely an inconvenience. I have corrected these problems below, so the steps should be a lot easier for anyone to follow.
First, I dug deep into the netherlands of my kitchen cabinets to find my Rehrucken Mold. Yes, it's Rehrucken, with an umlaut over the 'u'. I even had to 'Google it' to find its name! From whence it came to my kitchen I have no recollection, but I've had it for many years and have never used it. It is an Austrian creation typically used to bake a 'Saddle of Venison' Cake' (strange, but true). The mold is also called a Moravian Loaf Pan or simply a Ribbed Cake Pan. I thought it would be perfect to shape this confection. Of course, you can use any large loaf or 9 - 10 inch cake pan. This is what the Rehrucken pan looks like:

Ginger, Chocolate and Almond Yule Log
The recipes below include my comments and changes made to the original recipes.


Almond Dacquoise (Almond Cake)
Equipment: 2 mixing bowls, hand or stand mixer with whisk attachment, spatula, baking pan such as a 10”x15” jelly-roll pan, parchment paper. This can be baked two days ahead and wrapped tightly in plastic wrap to keep fresh.

Ingredients:
1 cup almond meal (2.8 oz, 80g) I first toasted about 1/2 cup of raw almonds, then ground them and measured 1 cup of almond meal.
1/2 cup (50g, 1.75oz) caster (extra fine granulated) sugar
2Tbsp (15g) all-purpose flour
3 large egg whites
4 Tbsp (50g, 1.75oz) granulated sugar

1. Finely mix the almond meal and the caster sugar. (If you have a mixer, you can use it by pulsing the ingredients together for no longer than 30 seconds). Sift the flour into the mix.

2. Beat the eggs whites, gradually adding the granulated sugar until stiff.

3. Pour the almond meal mixture into the egg whites and blend delicately with a spatula.

4. Grease a piece of parchment paper and line your baking pan with it.

5. Spread the batter on a piece of parchment paper to an area slightly larger than your desired shape (circle, long strip etc...) and to a height of 1/3 inches (8mm). Bake at 350°F (180°C) for approximately 15 minutes (depends on your oven), until golden. Let cool and cut to the desired shape.

Ginger Crème Brulée Insert
Equipment: Small saucepan, mixing bowl, baking mold, wax paper
Note: The ginger crème brulée can be flavored differently by simply replacing the ginger with vanilla, cardamom, lavender, etc.
Ingredients:
1/2-cup (115g) heavy cream (35% fat content)
½ cup (115g) whole milk
2 teaspoons ginger juice
2 tablespoons grated fresh ginger
4 medium-sized (72g) egg yolks
0.75 oz (2 Tbsp / 25g) granulated sugar
1/2 teaspoon vanilla essence
1. Heat the milk, cream, and gingers to just boiling. Remove from the stove and let the gingers infuse for about 1 hour.
2. Whisk together the sugar and egg yolks (but do not beat until white).
3. Pour the ginger-infused milk over the sugar/yolk mixture. Mix well. Add vanilla essence.
4. Line your mold with aluminum foil, using a piece that is large enough to cover all sides without any edges at the bottom of the mold. Pour the cream into the mold and bake with a water bath at 210°F (100°C) for about 35 minutes to 1 hour or until firm on the edges and slightly wobbly in the center.
The most respected Tartelette (http://www.tartelette.blogspot.com/) says: You can bake it without a water bath since it is going to go inside the log (the aesthetics of it won't matter as much since it will be covered with other things).... BUT I would recommend a water bath for the following reasons:- you will get a much nicer mouth feel when it is done- you will be able to control its baking point and desired consistency much better- it bakes for such a long time that I fear it will get overdone without a water bath. Now...since it is baked in a pan and it is sometimes difficult to find another large pan to set it in for a water bath, even a small amount of water in your water bath will help the heat be distributed evenly in the baking process. Even as little as 1 inch will help.
5. Let cool and put in the freezer for at least 1 hour to firm up and facilitate the final assembly.
Praline Feuillete (Crisp) Insert
Feuillete means layered (as in with leaves) so a Praline Feuillete is a Praline version of a delicate crisp.
The original recipe for the Praline Crisp lists Gavottes. Gavottes are crisp lace-thin crepes. They are not available in the US. I chose not to make them, and substituted ground gingersnaps, in keeping with my flavor.
I also made my own Almond Praline, based on the recipe in the July 2008 challenge. Here it is:
2/3 cup sugar
1 cup raw almonds, lightly toasted
1. Line a baking sheet with parchment. Butter parchment.
2. Put the sugar in a small, heavy pan. Heat on low flame for about 10 minutes until the sugar starts to melt around the edges. Do not stir. Swirl the pan if necessary to melt the sugar. Stir quickly if the sugar in the middle doesn't melt. Remove from heat when caramel in color and sugar is melted.
3. Quickly add the almonds and stir to coat. Pour onto parchment and spread into a single layer of almonds. Cool completely.
4. When praline is cold, break it up and place it in a processor. Process until it's a fine powder.
Ingredients for the Praline Feuillete:
3.5 oz (100g) semi-sweet chocolate
1 2/3 Tbsp (25g) butter
2 Tbsp (1 oz / 30g) praline powder
2.1oz (60g) gingersnaps, ground in processor
1. Melt the chocolate and butter in a double boiler.
2. Add the praline and the ground gingersnaps. Mix quickly to thoroughly coat with the chocolate.
3. Spread between two sheets of wax paper to a size slightly larger than your desired shape. Refrigerate until hard.
Dark Chocolate Ganache Insert
Equipment: pan, whisk. Note: Because the ganache hardens as it cools, you should make it right before you intend to use it to facilitate piping it onto the log during assembly. You can also cover the hardened Creme Brulee Insert with plastic wrap and pour the ganache over it. Re-freeze. You will get the correct shape for the ganache.
Ingredients:
1.75 oz (4 Tbsp / 50g) granulated sugar
4.5oz (2/3 cup – 1 Tbsp/ 135g) heavy cream (35% fat content)
5 oz (135g) dark chocolate, finely chopped
3Tbsp + 1/2tsp (45g) unsalted butter softened
3/4 ounces crystallized ginger, finely chopped
1. Make a caramel: Using the dry method, melt the sugar by spreading it in an even layer in a small saucepan with high sides. Heat over medium-high heat, watching it carefully as the sugar begins to melt. Never stir the mixture. As the sugar starts to melt, swirl the pan occasionally to allow the sugar to melt evenly. Cook to dark amber color.
2. While the sugar is melting, heat the cream until boiling. Pour cream into the caramel and stir thoroughly. Be very careful as it may splatter and boil.
3. Pour the hot caramel-milk mixture over the dark chocolate. Wait 30 seconds and stir until smooth.
4. Add the softened butter and whip hard and fast. The chocolate should be smooth and shiny.
5. Add ginger and stir.

Foreground: Creme Brulee Insert, Middleground: Feuillette Crisp, Background: Ganache Insert


Dark Chocolate Mousse
Here I encountered a problem with the sugar syrup (see picture below). I also whipped the remaining cream at the end before I added it to the chocolate mixture to create a mousse consistency.
Equipment: stand or hand mixer with whisk attachment, thermometer, double boiler or equivalent, spatula Note: You will see that a Pate a Bombe is mentioned in this recipe. A Pate a Bombe is a term used for egg yolks beaten with sugar syrup, then aerated. It is the base used for many mousse and buttercream recipes. It makes mousses and buttercreams more stable, particularly if they are to be frozen, so that they do not melt as quickly or collapse under the weight of heavier items such as the crème brulee insert.
Ingredients:
.5 sheets gelatin or 5g / 2+1/4 tsp powdered gelatin
1.5 oz (3 Tbsp / 40g) granulated sugar
1 ½ tsp (10g) glucose or thick corn syrup
0.5 oz (15g) water
50g egg yolks (about 3 medium)
6.2 oz (175g) semi-sweet chocolate chips
1.5 cups (350g) heavy cream (35% fat content)
1. Soften the gelatin in cold water. (If using powdered gelatin, follow the directions on the package.)
2. Make a Pate a Bombe: Beat the egg yolks until very light in colour (approximately 5 minutes until almost white).
3. Cook the sugar, glucose syrup and water on medium heat for approximately 3 minutes (if you have a candy thermometer, the mixture should reach 244°F (118°C). If you do not have a candy thermometer, test the sugar temperature by dipping the tip of a knife into the syrup then into a bowl of ice water, if it forms a soft ball in the water then you have reached the correct temperature.

The temperature of the sugar syrup rose very quickly after 243F. In fact, it jumped to 268F but I decided to use it regardless. This is what I got: lovely icicles on my whisk and the sides of the bowl. Pretty, but not what the doctor ordered!


4. Add the sugar syrup to the beaten yolks carefully by pouring it into the mixture in a thin stream while continuing to beat the yolks. Continue beating until cool (approximately 5 minutes). The batter should become thick and foamy.

5. In a double boiler or equivalent, heat 2 tablespoons (30g) of cream to boiling. Add the chopped chocolate and stir until melted and smooth.

6. Pour the melted chocolate over the softened gelatin, mixing well. Let the gelatin and chocolate cool slightly and then stir in ½ cup (100g) of cream to temper. Add the Pate a Bombe.

7. Whip the rest of the cream and fold gently with a spatula into chocolate mixture.

Dark Chocolate Icing
I doubled the following recipe for the log. This is an amazing icing for cakes because it pours beautifully and freezes well. It also remains shiny and is easy to cut. I'll definately use it for bombes and other frozen cakes.
Equipment: Small bowl, small saucepan. Note: Because the icing jellifies quickly, you should make it at the last minute.
Ingredients:
4g / ½ Tbsp powdered gelatin or 2 sheets gelatin
¼ cup (60g) heavy cream (35 % fat content)
2.1 oz (5 Tbsp / 60g) granulated sugar
¼ cup (50g) water
1/3 cup (30g) unsweetened cocoa powder
1. Soften the gelatin in cold water for 15 minutes.
2. Boil the rest of the ingredients and cook an additional 3 minutes after boiling, stirring constantly.
3. Add to the chocolate mixture. Mix well.
4. Let cool while checking the texture regularly. As soon as the mixture is smooth and coats a spoon well (it is starting to jell), use immediately.
How To Assemble your French Yule Log:
THIS IS FOR UNMOLDING FROM UPSIDE DOWN TO RIGHT SIDE UP, AS I DID. You will want to tap your mold gently on the countertop after each time you pipe mousse in to get rid of any air bubbles.
Line your mold or pan, whatever its shape, with rhodoid (clear hard plastic, I usually use transparencies cut to the desired shape, it’s easier to find than cellulose acetate which is what rhodoid translates to in English) OR plastic film. Rhodoid will give you a smoother shape but you may have a hard time using it depending on the kind of mold you’re using. I lined my Rehrucken pan with plastic wrap.
Pipe one third of the Mousse component into the mold.
Take the Creme Brulee Insert out of the freezer at the last minute and set on top of the mousse. Press down gently to slightly ensconce it in the mousse.
Pipe second third of the Mousse component around and on top of the Creme Brulee Insert.
Cut the Praline/Crisp Insert to a size slightly smaller than your mold so that it can be surrounded by mousse. Lay it on top of the mousse you just piped into the mold.
Pipe the last third of the Mousse component on top of the Praline Insert.
Freeze for a few hours to set. Take out of the freezer.
Pipe the Ganache Insert onto the frozen mousse leaving a slight edge so that ganache doesn’t seep out when you set the Dacquoise on top.
Close with the Dacquoise. Freeze until the next day.
So the order is (from first down in the mold):
1) Dark Chocolate Mousse
2) Crème Brulee Insert
3) Mousse again
4) Praline/Crisp Insert
5) Mousse
6) Ganache Insert
7) Dacquoise
THE NEXT DAY...Unmold the log and set on a wire rack over a shallow pan.
Cover the cake with the icing. Let set. Return to the freezer.
You may decorate your cake however you wish. The decorations can be set in the icing after it sets but before you return the cake to the freezer or you may attach them on top using extra ganache or leftover mousse, etc... I decorated my log with fresh cranberries and holly leaves.
Transfer to the refrigerator two to three hours before serving, so the frozen parts have a change to soften a little. Slice log into 1/2 inch thick pieces. Serves about 14.


Prijatno!

Monday, December 22, 2008

An elegant Christmas cookie with many names!


A cookie that is so elegant and delectable deserves a lot of attention and more than one name, right?

Venetians, Italian Flag Cookies, Seven-Layer Cookies and Rainbow Cookies. These are the names given to a jewel-like cookie that hails from Italy and is typically baked during the Christmas season.

They are sometimes called Venetians, because their colourful layers bring to mind the luminous stained glass of Venice and Murano. Tint the marzipan layers green and red (with one remaining white) and TaDah - you have the Italian flag, hence Italian Flag Cookies. Count the layers, including jam and chocolate, and you have seven layers. Rainbow Cookies - well that's too obvious! Personally, I like to call them Venetians, because they evoke the grandeur and wealth of Venice, a brilliant diamond on the Adriatic Sea.

The basis of this cookie is almond paste. It produces a dough that is thick and very moist. Although a little time consuming, you will be gifted with little gems that will steal the show in any cookie gift box or tray. Fortunately, it won't take you as long to make them as it would stained glass!

I found this recipe years ago in Gourmet magazine (December, 1999). I have made a couple of changes which simplifies the method a little. You will need three 13 x 9 inch metal baking pans, so I suggest you beg, borrow or steal from the neighbors' if you need to!

Venetians

You will need:

7 ounces almond paste

1 cup sugar

3 sticks (12 ounces) unsalted butter, softened

4 large eggs

1 teaspoon almond extract

2 cups sifted all-purpose flour (sift before measuring)

1/4 teaspoon salt

5 drops green food coloring (or more to reach desired color)

5 drops red food coloring (or more to reach desired color)

2-3 drops yellow food coloring (or you can leave the batter untinted)

1/2 cup seedless raspberry jam or smooth apricot jam (warm it then press through a sieve to remove lumps)

6 ounces semisweet chocolate chips

This is how to make them:
Preheat oven to 350F. Grease 3 13x9 inch metal baking pans with spray oil. Place each pan on three pieces of waxed paper. Outline the bottom of the pans in pencil. Cut out the shapes and place waxed paper on the inside of the greased pans. Than, flip the waxed paper over in each pan, and voila, both sides of the waxed paper will be greased.

Break almond paste into small chunks and place in food processor. Add the sugar and process until no lumps remain. Transfer to your mixer bowl and add butter. Beat until light and fluffy for about 3 minutes. Add eggs, one at a time, and beat well, stopping every minute or so to scrape down sides of bowl. This will take about 5 minutes. On lowest speed, add almond extract, flour and salt. Don't beat too much at this point or you'll lose all the air that your beaters have incorporated into the batter.

Divide the batter into thirds (about 1 1/2 - 2 cups each). To each third add red, green and yellow coloring and carefully blend into each batter, scooping the batter up from the bottom and lifting it to the top. Do not beat the batters. Spread each batter separately into the three pans and even out the top with a spatula (I use a small offset spatula). The layers will be thin, so reach for the corners!

Bake layers individually in middle of oven until just set and the edges are beginning to brown, about 7 - 10 minutes. For each layer: let rest for 5 minutes on rack then invert onto another rack. Carefully remove wax paper and cool completely. You should assemble the layers on the same day as you bake them so that the layers bind properly.

Line a large tray or cutting board with wax paper (this will allow you to cut the cookies easily). Carefully slide green cookie layer onto it. Spread 1/4 cup of jam evenly on top. Scrape off any excess jam. You want a very thin layer of jam so that the cookie layers don't slide off each other when you cut the cookie shapes. Top it with the yellow layer and spread with the rest of the 1/4 cup jam. Scrape off excess jam. Top with red layer. Cover with plastic wrap and a hard-cover book to weight it down. Set aside for at least three hours and up to 3 days. The longer it is allowed to sit, the better the layers with stick to each other. There is no need to refrigerate it.

Pretty layers


A few hours before serving, melt chocolate chips in a double boiler or microwave. Stir gently until smooth. Remove weight and plastic from cookie layers and pour chocolate on top. Spread top with offset spatula. Let stand at room temperature until almost set. You will see parts of the chocolate drying. With a long, sharp knife, trim the edges and save for snacking.

Trim the edges and slice


To cut: Use a long, sharp knife. Clean and dry knife after every cut. Cut into small (1 x 1 inch) squares, rectangles or diamond shapes using a smooth downward motion - do not move knife up and down. To cut diamond shapes, cut at 1-inch intervals lengthwise and then at 1-inch intervals on the diagonal. Makes about 7 dozen.


Merry Christmas to all, and all of the best in the coming year!

Prijatno!